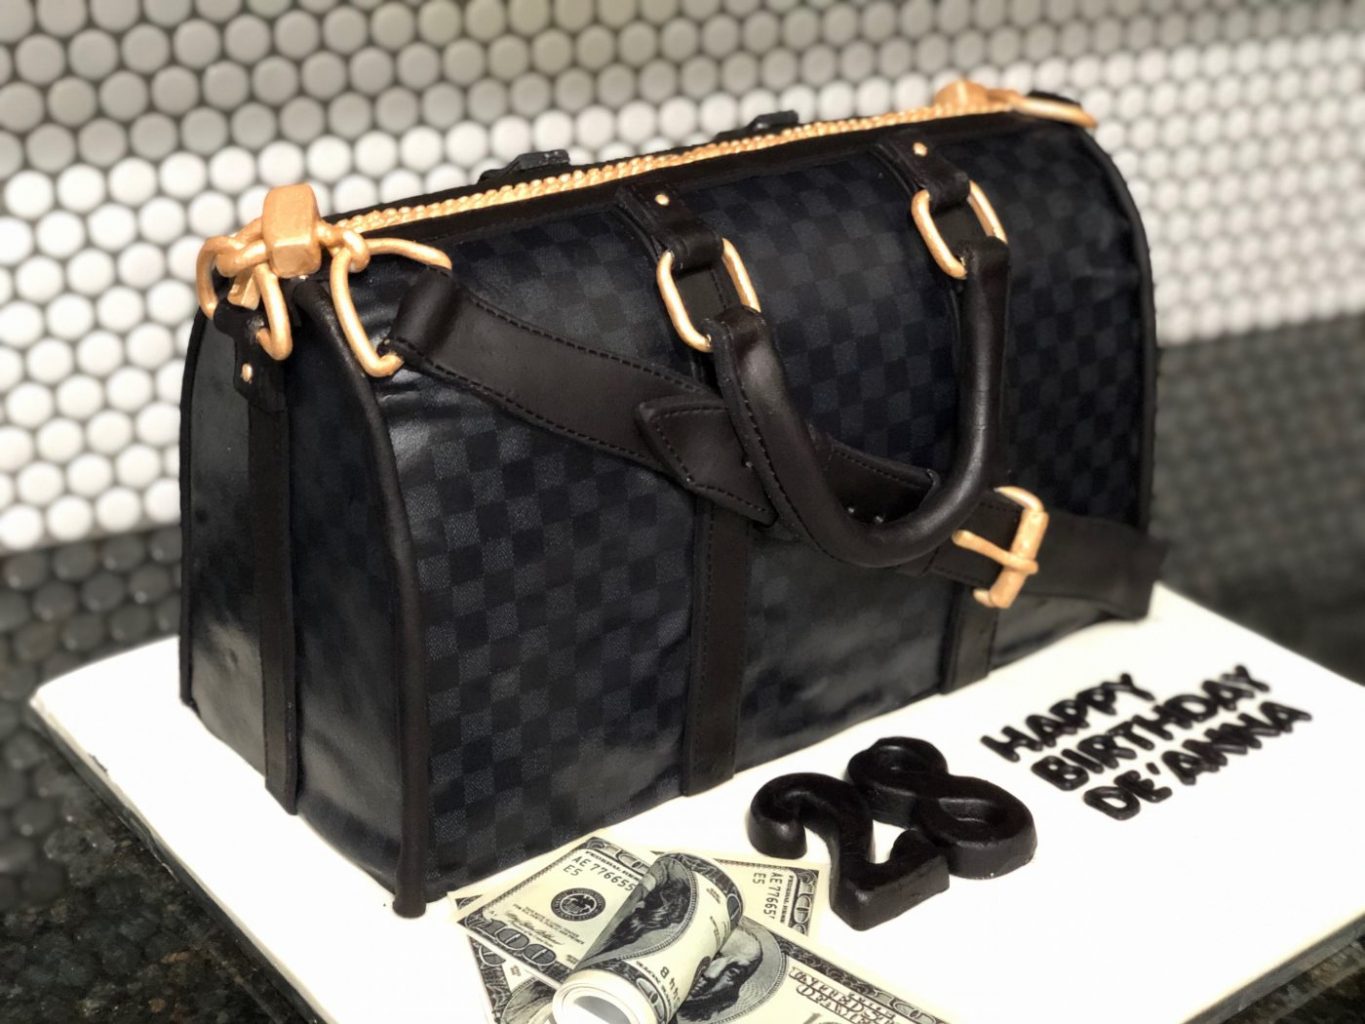
When you dive into crafting a duffle bag cake, there are a few important tips to keep in mind early on. Just like with anything, practice makes perfect. I can still vividly recall my very first attempt at a handbag cake, which, by the way, is quite similar to making a duffle bag cake. Let me tell you, it was a bit of a wild ride from beginning to end.
But here’s the fun part: In this tutorial, I’ll be your guide on a journey to create a fabulous Duffle Bag Cake. Even though I had a crystal-clear vision of how I wanted my cake to turn out, I’ll admit I wasn’t entirely certain about the right way to go about it. That’s when I came up with a nifty idea – a template! It made sure I got that perfect shape and size down pat. And don’t worry; I’ll show you exactly how to make your very own template, customized to match your cake’s serving size.
Let me tell you, when I finally laid eyes on my finished cake, I was over the moon! And guess what? I can’t wait to share all the steps with you, so you can pull off this Duffle Bag Cake masterpiece too. So, kick back, relax, and get ready for a step-by-step journey on how to create your very own Duffle Bag Cake. Plus, I’ll sprinkle in some nifty tips that can come in handy whenever you’re in the mood for crafting a handbag-themed cake!”
Supplies need:
- 4-6 layers of cake (depending on serving size)
- ganache
- fondant
- Extruder
- Gum Paste
- Metallic Paint
- edible print sheets (depending on design)
- carving knife (large and small)
- Thick Floral Wire (depending on the design)
- exact-o knife
- fondant stitch tool
- fondant strip cutter
- Zipper Mold
- duffle bag/handbag template
Step 1: Crafting the Perfect Shape
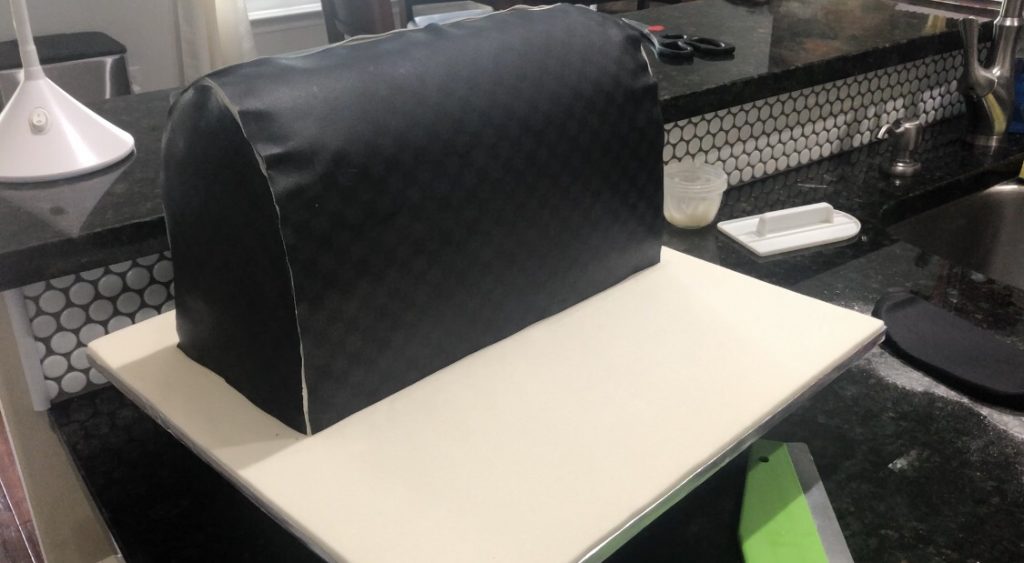
To kickstart this journey, I relied on trusty poster board to create a template for the Duffle Bag Cake. You’ll need a total of four pieces of poster board – two for the sides and two for the front and back. For my cake serving around 50 people, I crafted the front and back pieces at a dimensions of 16 inches in width by 12 inches in height, while the two side pieces measured 4 inches wide by 12 inches tall.
Now that you have your template pieces cut out, use them as a guide to carve out the cake into its basic shape. As you progress, round off the sides of the cake to give it that distinctive Duffle Bag appearance.
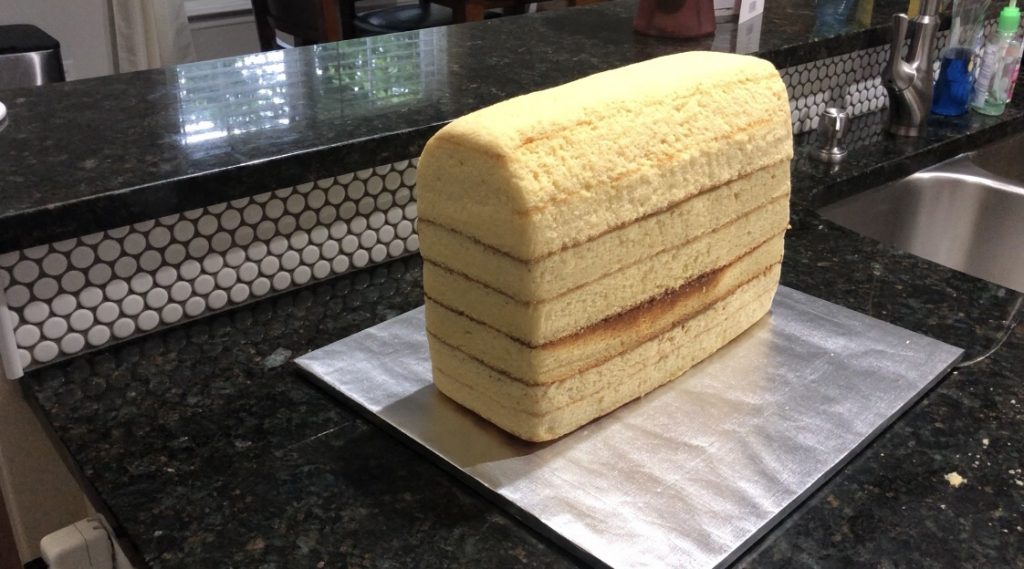
Should you find that you haven’t quite achieved the precise shape you’re aiming for and your cake is becoming a bit soft, don’t worry. Pop it back into the freezer to firm up again. It’s a good idea to wrap the cake in plastic wrap before freezing to prevent any unwanted freezer flavors. Once the cake has re-frozen, you can resume carving it until you’ve reached the final desired shape of your Duffle Bag Cake.
Step 2: Locking in the Cake’s Shape
In this step, I highly recommend using ganache to frost the cake. This will create a hard outer shell for the cake and will help the cake to retain it’s shape. Once the Ganache, is applied to the cake, place the cake into the refrigerator to harden for 30 minutes to an hour.
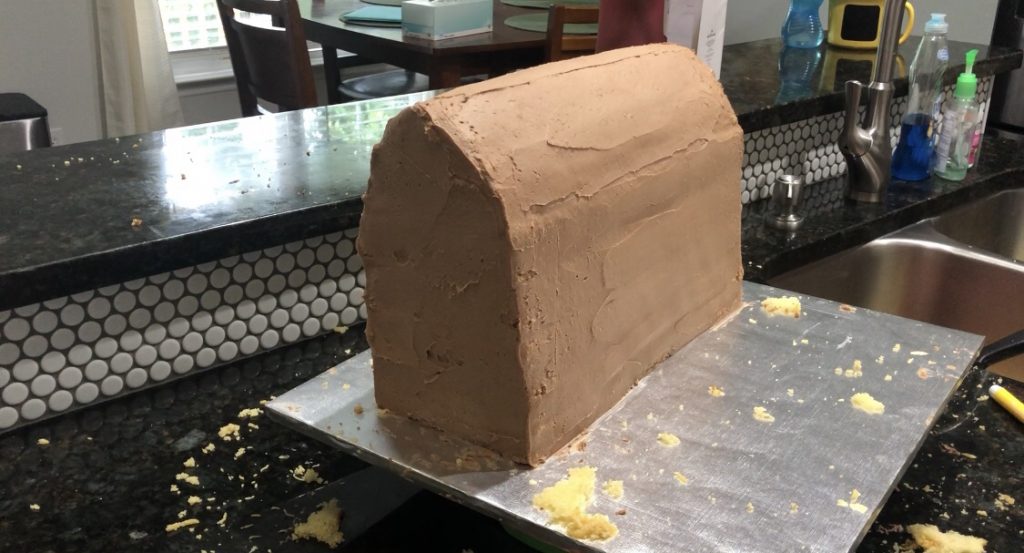
When the ganache is firm, add a light layer of shortening to the ganache before applying fondant. The shortening will help the fondant to stick to the cake. You can also use fondant glue if you don’t want to use shortening.
Step 3: Wrapping the Cake in Fondant and Edible Print Sheets
Wrapping a handbag cake or this one, in particular, might seem a tad tricky, but don’t sweat it; I’ve got some handy tricks up my sleeve.
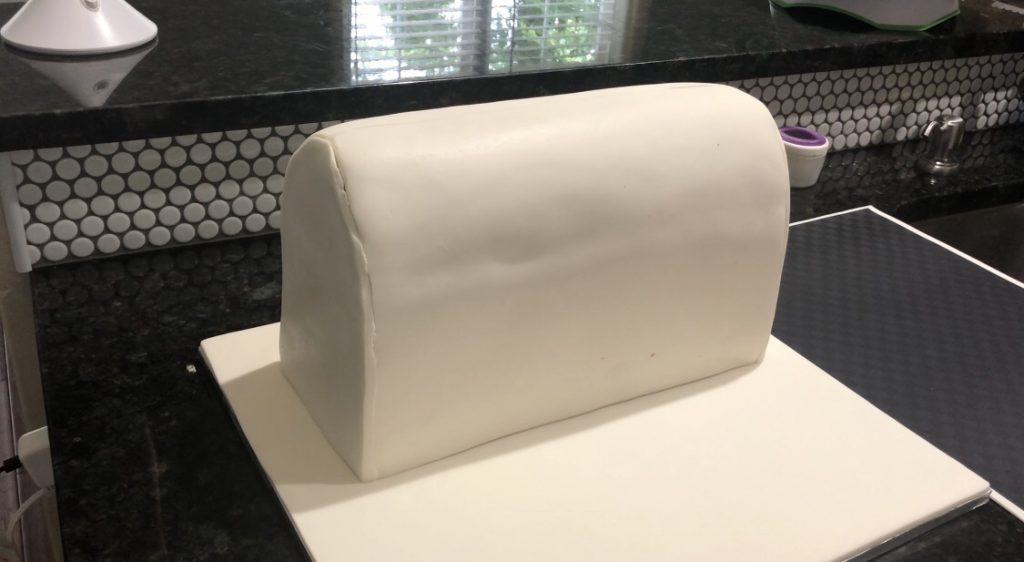
Once you’ve draped that fondant over your cake – nice and easy, does it – it’s time to introduce those Edible Print Sheets. And here’s the secret sauce: you’ll use the same trusty template.
To make those Edible Print Sheets stick to the fondant like they were made for each other (which they are), simply give the cake’s exterior a light smudge of shortening. The printed sheets will effortlessly cling to the fondant, making your cake look like a pro’s handiwork.
Step 4: Crafting Handles, Links, and More
In this step, we’re getting creative and bringing this cake to life. Let’s start with those handles – a key ingredient in the cake’s charm. Roll out two pieces of gum paste, or if you have an extruder handy, that can work wonders for a perfectly rolled piece of gum paste.
If you don’t have gum paste at your disposal, don’t fret; you can use fondant with a dash of gum tex to give it that needed stiffness, just like gum paste. Once you’ve got both pieces of fondant rolled out, slide a piece of floral wire through each gum paste piece. This wire will provide the necessary stability for the handle when it’s nestled into the cake. Now, for the exterior piece of fondant, match it to the color of the actual handbag. For instance, if your duffle bag boasts brown handles, roll out brown fondant.
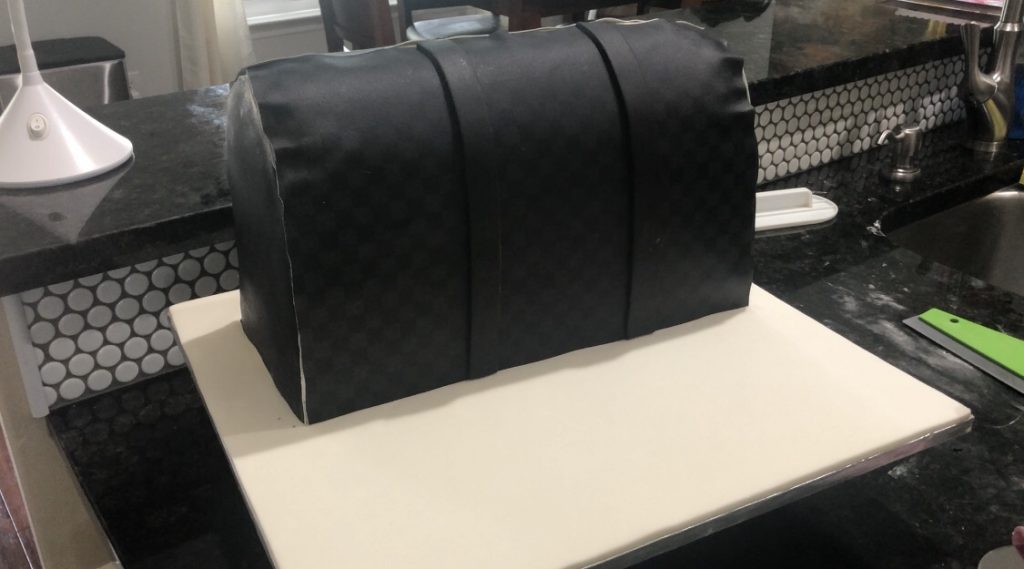
In my case, I went with sleek black handles. Once the exterior fondant is ready, gently fold it onto the gum paste. You can use fondant glue or a bit of water to bond them together. Trim off any excess fondant, and for some extra flair, use a Fondant Stitching Tool to add those lifelike details. Lastly, shape the handle into a ‘U’ and let it dry for about 24 hours.
Now, let’s talk zippers. To create this essential detail, I used a zipper silicone mold that was perfect for our duffle bag. The mold’s length fell a bit short for the duffle bag, so I made two molds and pieced them together to form a longer zipper. This made the job quick and straightforward, a real game-changer.
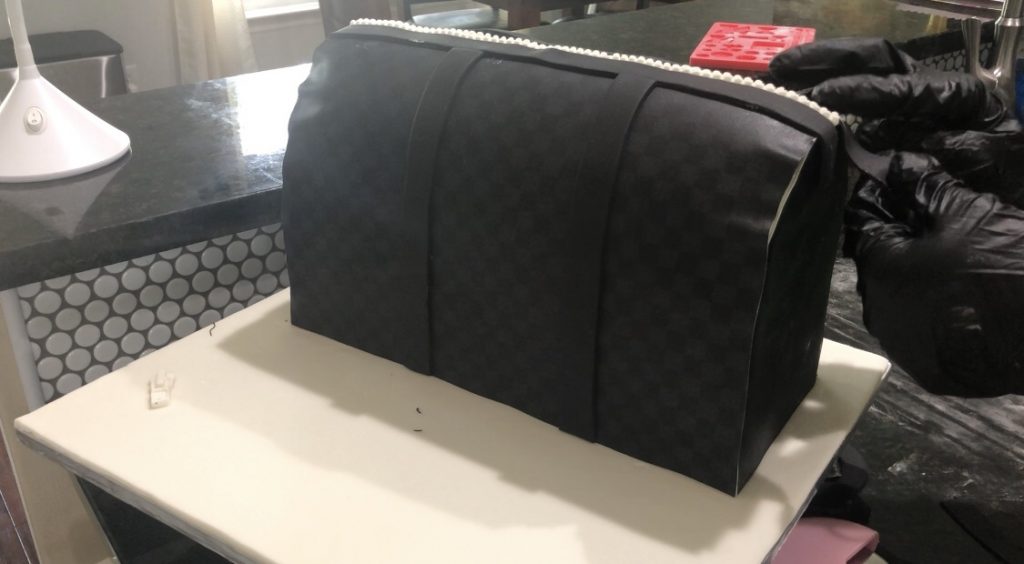
As for the buckles and links on the belt and handle, I whipped out the extruder again. Gum paste is the way to go here because these pieces need to be sturdy to support the shoulder strap and handles.
Don’t forget about the binding for the cake’s corners. Yes, an extruder comes in handy once more for crafting the duffle bag’s binding. You can attach the binding to the cake right away. Easy, right?
Step 5: Adding the Cake’s Final Touches
Now, let’s put the icing on the cake, but before we dive into the details like buckles, links, handles, and the shoulder strap, we’ve got a little painting to do. Grab some Edible Metallic Paint – I went with Glamorous Gold from Edible Art Decorative Cake Paint, but silver works too.
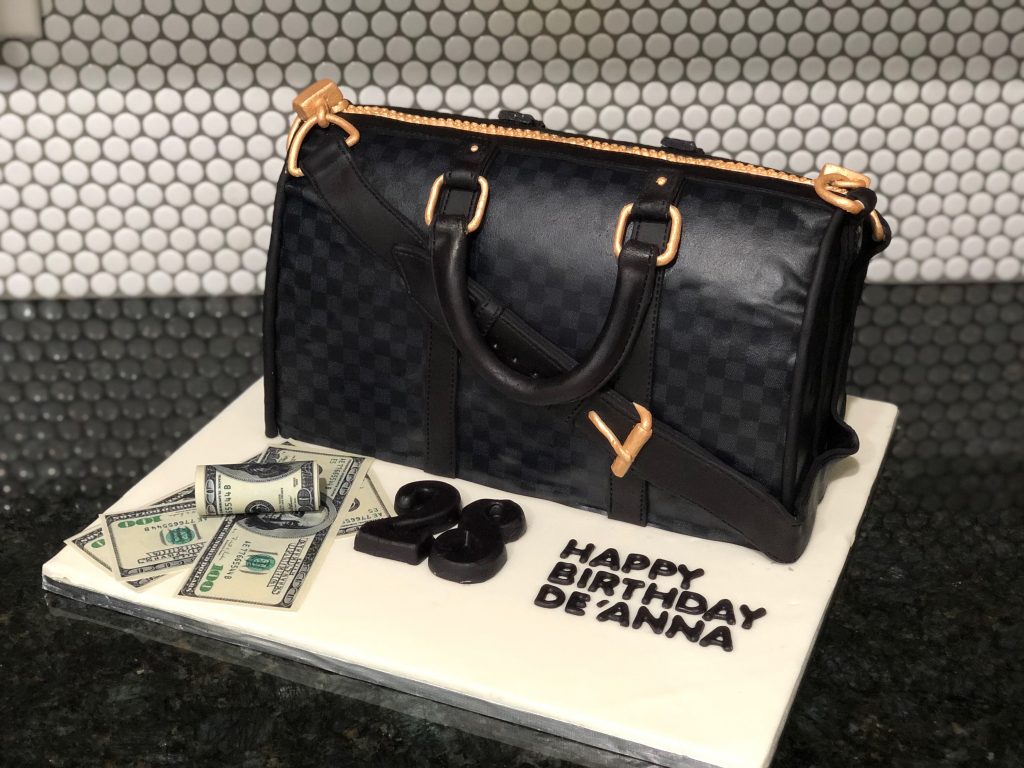
Give those buckles and handles two coats of paint for that extra shimmer. Be patient and allow about 30 minutes between each coat for the paint to dry thoroughly. Once they’re all dried up and looking glam, it’s time to add these exquisite pieces to the cake.
And there you have it, your very own professionally crafted Duffle Bag Cake!
Sure, it might seem like a bit of a journey to create this cake, but it’s so rewarding to watch each piece come together into a lifelike duffle bag masterpiece. Remember, in the world of cake decorating, having the right tools can make any job a breeze.
I’d love to hear about any techniques or nifty tricks you’ve discovered in your Duffle Bag Cake-making adventures. Thanks a bunch for reading, and remember to stay blessed and enjoy your cake!
